From the title of the blog, the first question comes in mind is “What is PowerShell?”
The answer is: It is an object-oriented automation engine and scripting language developed by Microsoft and built on the .Net framework. It has an interactive command-line shell where the user can execute commands to fulfill their tasks.
It’s mainly used in configuring systems and automate administrative tasks. Actually, PowerShell and PnP-PowerShell scripts are highly used by SharePoint administrators and SharePoint developers can run large and bulk operations on sites. For example, add large data in SharePoint lists, apply permissions to users in sites, etc. Below scenario is often concluded while SharePoint consulting.

Scenario
For on-premise servers: Sometimes client provides SharePoint administrator access of site but without remote desktop access connectivity so we cannot take RDP session to run PowerShell scripts for managing SharePoint sites. In this case, we can log in to one of the client’s machines which are connected to SharePoint farm domain and after that, we can run PnP-PowerShell cmdlets for SharePoint site management which is not possible with conventional PowerShell scripts.
PowerShell scripts are based on the .Net framework so for execution, they are highly dependable on Microsoft OS versions where PnP-PowerShell is platform independent which means the user can run cmdlets from their Mac or Linux machines to manage SharePoint sites.
SharePoint administrators majorly use PowerShell scripting to manage SharePoint servers. Authorized administrators can perform a wide variety of operations in SharePoint On-premise and SharePoint Online by executing cmdlets (pronounced “command-lets”).
Microsoft provides cmdlets for these 2 systems:
- List of cmdlets for SharePoint On-premise server: SharePoint Server PowerShell
- List of cmdlets for SharePoint Online: SharePoint Online PowerShell
The SharePoint Development Community
Commonly known as “SharePoint PnP Community” (PnP stands for Patterns and Practices) which is an open source initiative coordinated by the SharePoint engineering team. This community controls documentation, reusable controls and samples related to SharePoint development. Enthusiast developers or users can contribute their efforts in this community via GitHub. It is community driven open source project where Microsoft and external members can share their learning and implementation practices for Office, Office 365 and SharePoint servers. It was first started with guidance in the SharePoint add-in model and then evolves with other areas like SharePoint framework, Microsoft graph API, Office add-ins and Office 365 APIs.
Let’s talk about PowerShell commands prepared by the PnP community commonly known as PnP-PowerShell.
PnP-PowerShell
Microsoft has already provided a library of PowerShell commands for SharePoint On-premise servers and SharePoint Online along with separate command-line Shell. The question appears in mind that “What is PnP-PowerShell and what is the use of it?”
SharePoint Patterns and Practices contains a library of PowerShell commands to ease the life of SharePoint administrators who can perform complex tasks in minutes with the new PnP PowerShell commands. These commands use CSOM and work for both SharePoint Online and SharePoint On-premise servers.
Most amazing and facilitating feature of PnP-PowerShell is cross-platform execution. PowerShell cmdlets used for SharePoint before were Microsoft OS dependent but now, you can use PnP-PowerShell with different platforms like Mac and Linux.
One of the benefits behind CSOM commands for SharePoint On-premise servers is that an administrator can use cmdlets without logged-in to servers which means the administrator can access servers from any machine’s PowerShell command prompt which is connected with same domain in the same farm.
PnP-PowerShell provides something we can call “Context Switching”. For example, you are connected to the SharePoint Online site. Now you want to do some admin side operations. With old SharePoint Online cmdlets, you need to first close the connection for the current site and after that, you need to create the context to connect to admin site using different URL (i.e.: https://admin.sharepoint.com). With PnP-PowerShell cmdlets, you can easily connect to admin site without creating the new context or closing older context.
PnP-PowerShell cmdlets:
Connect-PnPOnline https://contoso.sharepoint.com Get-PnPLis Get-PnPTenantSite |
Using the 1st line, you are connected to the SharePoint Online site. In 2nd line, you get all lists from the site. And using the 3rd line, you are now connected to SharePoint admin site. It creates a clone of context during execution of the 3rd line, to use further in operations. So there is no need do new connection for admin site using commands.
Let’s start installation without wasting much time.
Installation
Prerequisites
- If you are using Windows Server 2012 R2 OS. Normally, this OS has PowerShell version 4. You require to upgrade PowerShell to version 5. Kindly download setup file from below URL to upgrade PowerShell: https://www.microsoft.com/en-us/download/details.aspx?id=54616
- You need to be a local administrator to run PowerShell as an administrator.
- Set execution policy to allow to run remote scripts.
Steps:
- Run
get-executionpolicyPowerShell command to get status of execution policy as shown below:
- If it’s not set to “Remote signed”. Then set it by this command:
set-executionpolicy remotesigned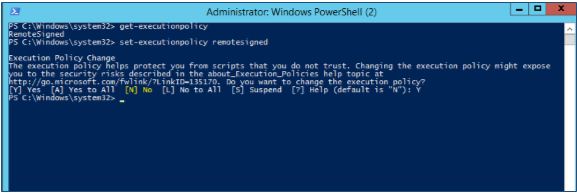
- Need appropriate permissions in SharePoint Online or in SharePoint server.
Note: After performing the required operations through PnP cmdlets, set the execution policy from “Remote signed” to the original one i.e. the output of the get-executionpolicy cmdlets.
Install Setup
First approach: PowerShell Gallery
If your main OS is Windows 10, or if you have PowerShellGet installed, you can run the following commands to install package according to your environment need:
| SharePoint Version | Command to install |
|---|---|
| SharePoint Online | Install-Module SharePointPnPPowerShellOnline |
| SharePoint 2016 | Install-Module SharePointPnPPowerShell2016 |
| SharePoint 2013 | Install-Module SharePointPnPPowerShell2013 |
Here are some warnings or error messages with workarounds you might face during installation:
- Sometimes for On-premise servers, if it gives below warning:Warning: user declined to install untrusted module SharePoint PNP PowerShellUse “-Force” attribute after the command:e.g.:
Install-Module SharePointPnPPowerShell2013 –Force - Error message: PackageManagement\Install-Package: The version ‘x.x.x.x’ of the module ‘SharePointPnPPowerShellOnline’ being installed is not catalog signed. Use below cmdlet:e.g.:
Install-Module SharePointPnPPowerShellOnline -SkipPublisherCheck -AllowClobber
Second approach: Setup files
Download setup files from releases. It will provide different setup file for SharePoint 2013, 2016 and SharePoint Online. Install it according to your server needs. After installation, you need to restart the open instance of PowerShell.
Third approach: Installation script
It will require at least PowerShell v3 installed in the machine. You can check the version of PowerShell by running $PSVersionTable.PSVersion.
To install the cmdlets you need to run below command, which will install PowerShell Package Management and modules from PowerShell Gallery.
Invoke-Expression (New-ObjectNet.WebClient).DownloadString('https://raw.githubusercontent.com/sharepoint/PnP-PowerShell/master/Samples/Modules.Install/Install-SharePointPnPPowerShell.ps1') |
Install Updates
Every month a release will be available for cmdlets. You can install the latest updated version using below commands:
Update-Module SharePointPnPPowerShell*
You can check installed PnP-PowerShell versions with the following command:
Get-Module SharePointPnPPowerShell* -ListAvailable | Select-Object Name,Version | Sort-Object Version –Descending |
Output:

Getting Started
Connect to SharePoint Online site with PnP-PowerShell
- Let’s connect to SharePoint Online Site with below command:
Connect-PnPOnline –Url https://<tenant_name>.sharepoint.com –Credentials (Get-Credential)
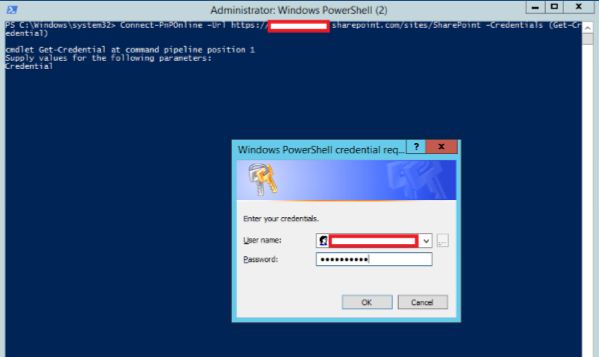
Note: If you are using multi-factor authentication on your tenant, use below command:
Connect-PnPOnline -Url https://<tenant_name>.sharepoint.com -UseWebLogin
- You can see all cmdlets provided by PnP with below command:
Get-Command -Module *PnPPowerShellOnline*
Output:
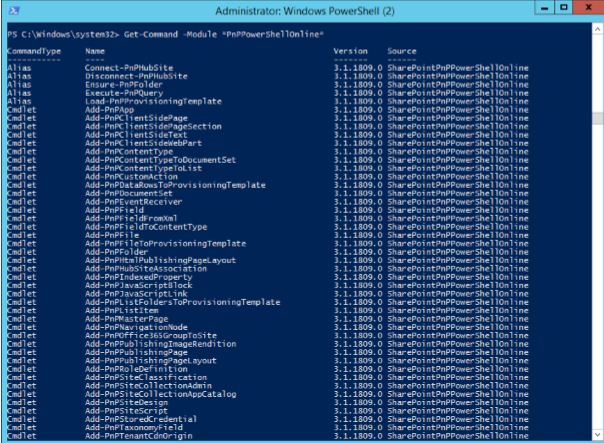
In 3.1.1809.0 version, there are 348 commands available to manage SharePoint Online.Create one custom list and perform CRUD operations
- Connect to site using above commands.Create custom list
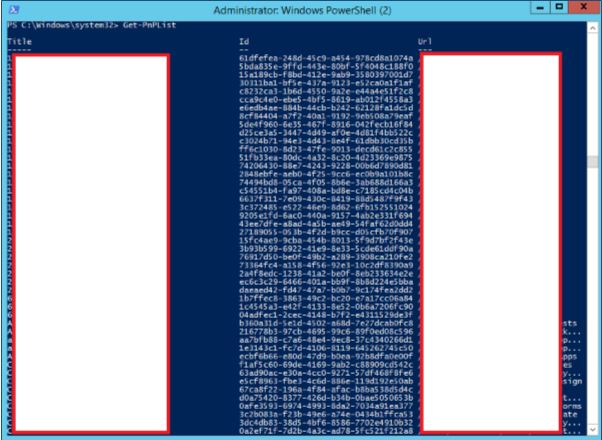
- Using below command, get all lists from SharePoint site.
Get-PnPListOutput:
- Create new list with below command:
$listName="NewPnPList" New-PnPList -Title $listName -Url "NewPnPList" -Template GenericList -EnableVersioning

Create fields in new list
- Using below commands, 2 fields will be created in list:
$listName="NewPnPList"
Add-PnPField -List $listName -DisplayName NameHF -InternalName NameHF -Type Text -AddToDefaultView
$choices="Sofware Developer","Sofware Tester","Release Manager"
Add-PnPField -List $listName -DisplayName RoleHF -InternalName RoleHF -Type Choice -Choices $choices -AddToDefaultView
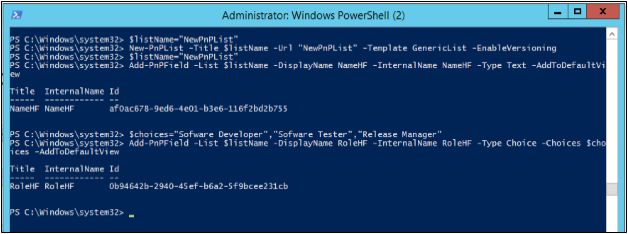
Output:
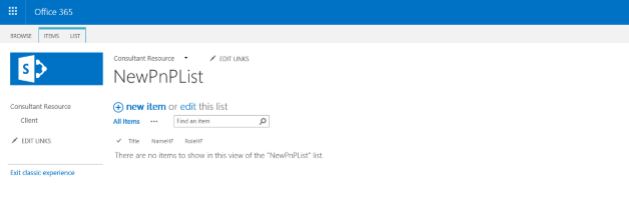
Create new item in list
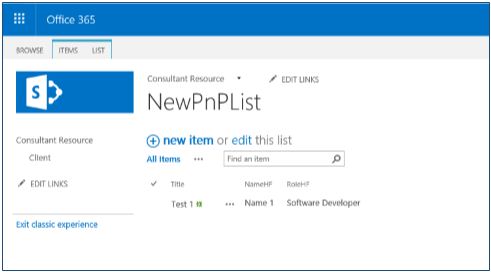
- Create new item using below command:
Add-PnPListItem -List "NewPnPList" -Values @{"Title" = "Test 1"; "NameHF"="Name 1"; "RoleHF"="Software Developer"}

Output:
Update existing item
- Update title of existing item using below command. Here, ID of list item is used for identity.
Set-PnPListItem -List "NewPnPList" -Identity 1 -Values @{"NameHF" = "John Doe"}
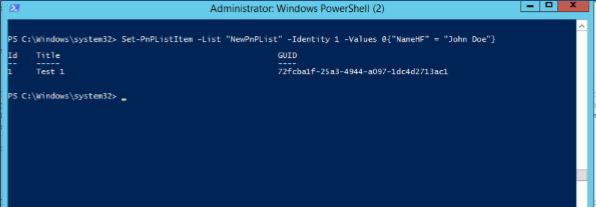
Output:
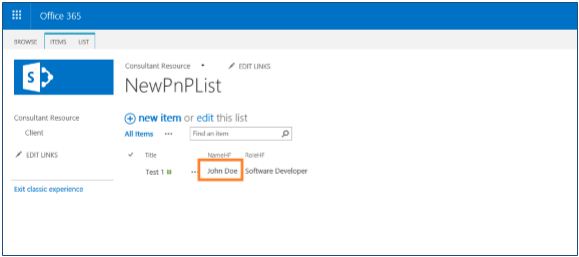
Delete existing item
- Delete list item using below command. Here, ID of list item is used for identity.
Remove-PnPListItem -List "NewPnPList" -Identity 1
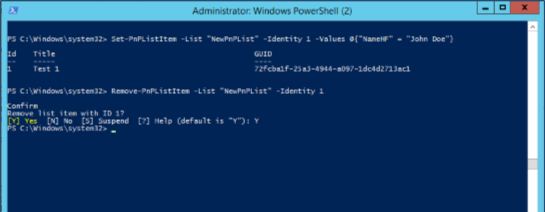
Output:
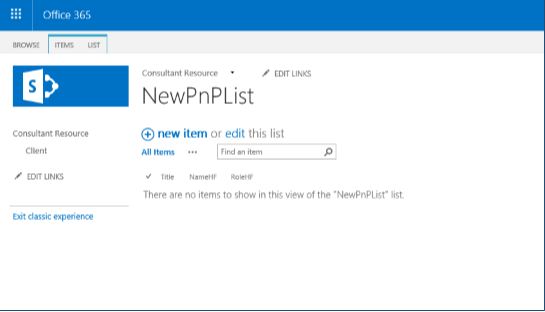


Comments
Leave a message...